Since we used all our budget on other stuff and needed to save some money, we went with the somewhat new technique of laying high quality plywood with oak veneer down and staining that.
Here are some shots of the rough install:


This is the view towards the master bedroom.
We are even exploring the idea of doing some wood on the walls like the great panel walls of the past - we need something interesting to break up this big wall:
OK I make big joke. Is funny yes? I like!
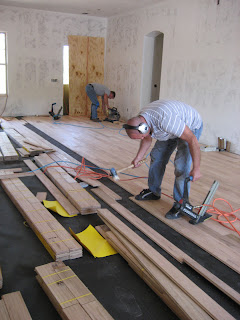
The plywood is the subfloor, part of the multilayer process of giving the wood floors a moisture boundary from the slab and adding some padding. The layers in the floor are: black sticky tar-looking cement, plastic sheeting, plywood, tar paper (same stuff they used on the roof) and then the wood flooring planks. Yarr!
Yes, here in America we use petroleum products in everything, even wood flooring!
The plywood is nailed down and so are the wood flooring planks.
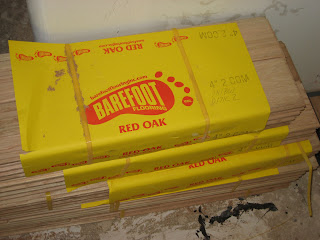
Here is really the wood we're using, 4" #2 red oak:
Here is a shot from the same angle as above with the wood planks lined up: looks better!
With the compressor for the nailgun, sanding, cutting, and hammering it can get loud installing wood floors!
Here's the great room again with proper flooring:
Looking towards the front door:
You can already see the great grains and textures in the reflected light, it's going to look really nice once it's stained!
Looking towards the front door:
They have more wood all lined up on the tar paper in the office, ready for tomorrow.
Sweet!
Last weekend we went and picked our tile. Here's a sneak preview of our selections:
Top left is going in Vivi's bathroom, top right will be in the kitchen, breakfast room and family room, Bottom Left will be in the master bath, and Bottom right will go in the office/guest bathroom! Hopefully this is all in budget right? Right?


